How to Do Spell Check In Mac
Owning a classy Macintosh laptop can get you Wow looks. But knowing the knack of dealing with even simple things like a spell check on a Mac can help you show off better. Though the spell check features of Word for Mac and the default Mac text editor, many newcomers may need some help to get started with creating flawless documents. This article will help show you how to check spelling on a mac.
How to check spelling in TextEdit
Mac’s own default editor for documents, TextEdit gives you several spell check features. By default it uses the language settings set in the System-wide settings. You are also allowed to enable or disable the spell check features on a system wide scale using these settings. To do enable or disable spell check of TextEdit using system wide settings, follow the below steps.
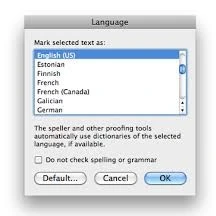
- Click on the System preferences icon in the Dock or select it from the Apple menu
- Click on Language and text preference pane -> Select the text tab
- Check or uncheck the Correct Spelling Automatically item for enabling or disabling the Auto check feature.
You can also do the same operation for a particular application (In this case, TextEdit). Edit -> Spelling and grammar-> Check spelling while typing.
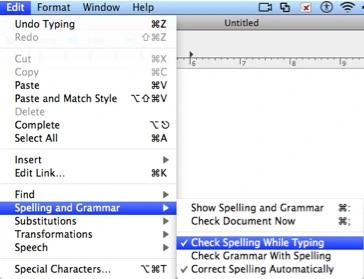
Now let us move on to the actual checking the spelling part.
Open the TextEdit application and type in your document or whatever you want. Just like the Office environment, TextEdit underlines the misspelled word and words that are not found in the dictionary.
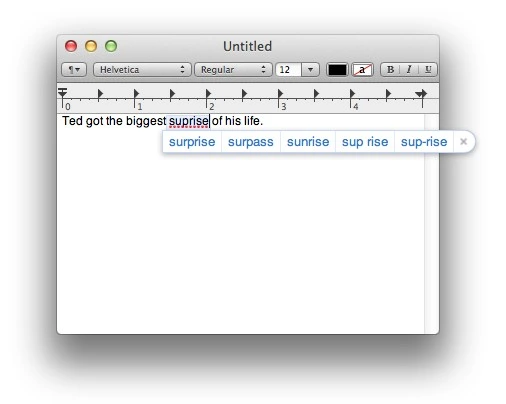
You are also provided with some help in case you just can’t remember the right spelling. To avail this help, highlight the word and right click on it. Select Edit->Spelling and Grammat->Show Spelling and Grammar. You will be provided with a list of suggestions from which you can pick the correct word. You can also alternatively right click or control+click the word to get the list of suggestions and options.

You can also run the Spell check using the Spelling and Grammar dialog box by clicking on the Edit menu -> Spelling and Grammar -> Show Spelling and Grammar. You can set your desired language and run the spell check using this checker.
How to check spelling and grammar in Word for Mac?
Word has a very good built in spell check system that provides you both automatic spell check and a spelling and grammar dialog box for in depth checking. To turn off the default squiggly lines that mark your words as wrong spellings, you can choose Word -> Preferences -> Spelling and grammar icon. Uncheck the Check Spelling As you Type or Check Grammar As you type check boxes for disabling this feature. You can check them again if you want to bring back the squiggly lines.
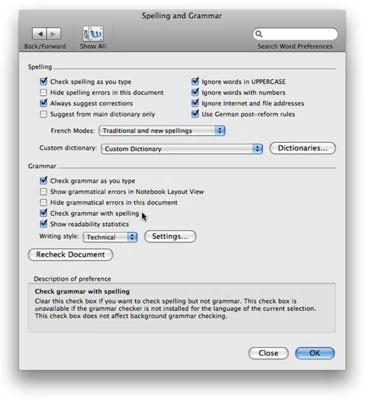
To check your word documents without the help of the red underlines, you can use the Spelling and Grammar dialog box. To open this dialog box, click on Tools->Spelling and grammar or press F7 after selecting a portion of misspelled text.
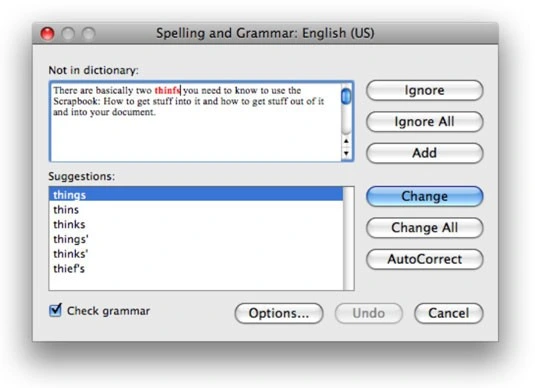
Word provides you with both grammar and spelling checks. You are allowed the options of ignoring, changing or adding the misspelled or flagged word to the dictionary.
Make use of spellcheck.net
Nothing is working right? Not able to grasp the technicalities? Worry not! Head in straight to the spellcheck.net and get your documents spell checked without any hassles. The easy to use interface and stress free environment would free you from all the troubles thus providing quick and easy spell check within no time.
Word of the day
Marches up to cannons mouth
- jarches up to cannons mouth
- karches up to cannons mouth
- ma4ches up to cannons mouth

